- Instapots – Types of Instant Pots and Why You Need One
- How to Get Started with Your Instapot Pressure Cooker
- Instapot: 7 Very Easy Recipes to Get Started
- Instant Pot: 15 All-Time Best Family Recipes
- 7 Favorite Healthy Instant Pot Recipes
- 9 Handy Products You Will Want for Your Instant Pot
You’ve purchased an Instapot. Are you excited and ready to use it or feeling a little bit overwhelmed? Let’s get that amazing cooker out of the box and onto your kitchen counter where you can start making tons of wonderful recipes for you and your family to enjoy. Here is everything you need to know for how to get started with your Instapot Pressure Cooker.
Instant Pot Unboxing Video
Watch to video to see the Instant Pot being unboxed and lots of tips on using it.
How to Get Started with Your Instapot Pressure Cooker
1.Open the Box
My new Instapot sat in the box unopened for weeks after it arrived. I feel silly admitting that, but I have read other people saying the same thing so I know I’m not the only one. It’s a little bigger and scarier than I had pictured. We had just moved into a new house and the last thing I thought I needed was to learn a new kitchen gadget.
When our new stove failed to arrive on time, I was forced to open the Instapot, and I’m so glad I did. This thing is amazing in all it can do.
While there is a learning curve to using it, you’ll be so thankful once you get the hang of it. Face your fears and get that wonderful gadget out of the box.
 Instant Pot Lux 6-in-1 Elec...Shop on Amazon
I have this model: Instapot IP-LUX Your Instapot might look a little different from mine if you have a different model. (Don’t have an Instapot yet? Click here to read about purchasing an Instapot.)
The Instapot has an instruction manual and chart. Certainly keep them for reference although I found them less than ideal.
Because an Instapot comes to pressure and also has quite a few settings, it’s not quite as easy as plugging it in and starting, so read on for all you need to know.
Important Considerations
- Always cook with at least 1 cup of water, broth, or other liquid in the Instapot or the food might burn to the bottom.
- Do NOT overfill the Instapot. Do not fill past the fill line and err on the side of filling even a bit less than that. Overfilling can result in liquid coming out the steam value and causing burns.
- Be sure the valve is in the down “steam” position to begin cooking.
- The Instapot is safe. It will not allow you to open the lid when pressure is built up.
- Don’t get rid of your crock pot. I’ve heard it said you can get rid of your crock pot once you have an Instapot, but I wouldn’t. The other day I took mine to a church potluck. The Instapot is much heavier (and more expensive). Also, sometimes I use one tool for the main dish and the other for a side dish for our family’s dinner.
2. Water Test
Before cooking any food in your Instapot, perform a water test. This is to be sure the seal is working properly. The water test only takes a few minutes and then you will be ready to start cooking.
The water test instructions are available in your manual. Here is a video link to instructions if you prefer to watch.
- Place insert (metal pot) into the Instant Pot.
- Pour 2 cups of water into the insert.
- Close the lid. It will chime when it’s closed correctly.
- Set the Pressure Release Valve to “sealing.”
- Press “Manual” button.
- Press the “-” button until 5 shows in the display. That’s it. The Instant Pot does not have a start button. After about 30 seconds, the machine will turn on. The display will switch from “5” (shown above) to “On.” The machine is now building pressure.
- After about five minutes, the float valve should lift into place. You shouldn’t see any steam leaking from the sides of the pot. Once the float valve seals the Instant Pot, the display will change from “On” to “5.”
- When the cook time completes, turn the pressure release valve to “venting.” This is called a quick release. Be sure to keep your hands and face away from the top of the pressure release valve.
If all works correctly, you can dump out the water and begin cooking.
3. Display Buttons of Your Instapot
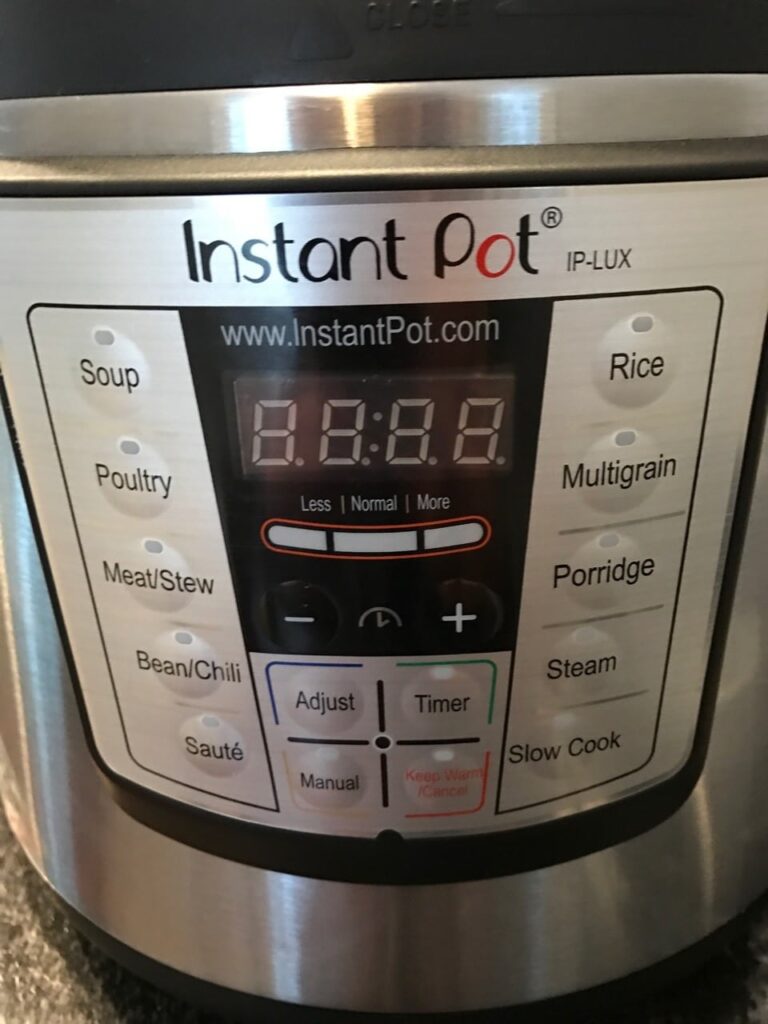
Understanding the display and buttons on your Instapot is important in using it correctly.
Instapot Display Buttons
When you plug in your Instapot and put the lid on top, you will hear a chime that lets you know you have seated the lid correctly. Be sure the vent is pushed into the down position when you begin the cooking process. (See photo below)
The first few times you use your Instapot, I strongly recommend you use a recipe that has specific Instapot recipe and button settings until you are familiar with how quickly an Instapot cooks food. One of my first recipes I made Beef Stew and cooked the vegetables far too long. We had carrot and potato sludge! (Although it was tasty, I prefer to chew my stew vegetables.) I didn’t realize the vegetables only needed to cook for 2-3 minutes.
Ride Side Buttons:
Rice – White and Brown Rice
MultiGrain – Bulgar, Barley, Quinoa
Porridge – Oatmeal
Steam – Vegetables
Slow Cook – This works just like a crock pot or slow cooker.
Left Side Buttons:
Soup – Broth-based soups
Poultry – Chicken pieces (a whole chicken will probably require more time or doing this twice)
Meat/Stew – Stew meat, ribs, Brisket, etc. (A large chunk of meat may require doing this twice or adding time)
Beans/Chili – Chili, dry beans
Saute – This is a new feature for the latest models of the Instapot. You can saute in this pot the same way you would on the stove, but it’s not a pot you would pull out just to brown ground beef. What this feature is helpful for is when you want to saute in the same pot — such as beef stew meat and keep those wonderful flavors from the saute in the stew.
Manual Buttons (middle square) – These are for manually adding your own times, and once you’ve used your Instapot for a few recipes you’ll feel comfortable doing this. I use the manual buttons half or more of the time.
Here is how to set cooking times with the manual buttons:
How to Set Cooking Times
- Press manual or any cooking program button to begin.
- A cooking time will appear, either suggested or the same as you used in that mode last time.
- Use the + and – keys to adjust time values.
- Remember that the + and – keys adjust time values. Heat values are adjusted using the ‘adjust’ button.

Cooking a whole chicken in the Instapot. Notice there is a place for the lid to rest on the edge of the Instapot. Also the whole inner pot comes out for easy serving and washing.
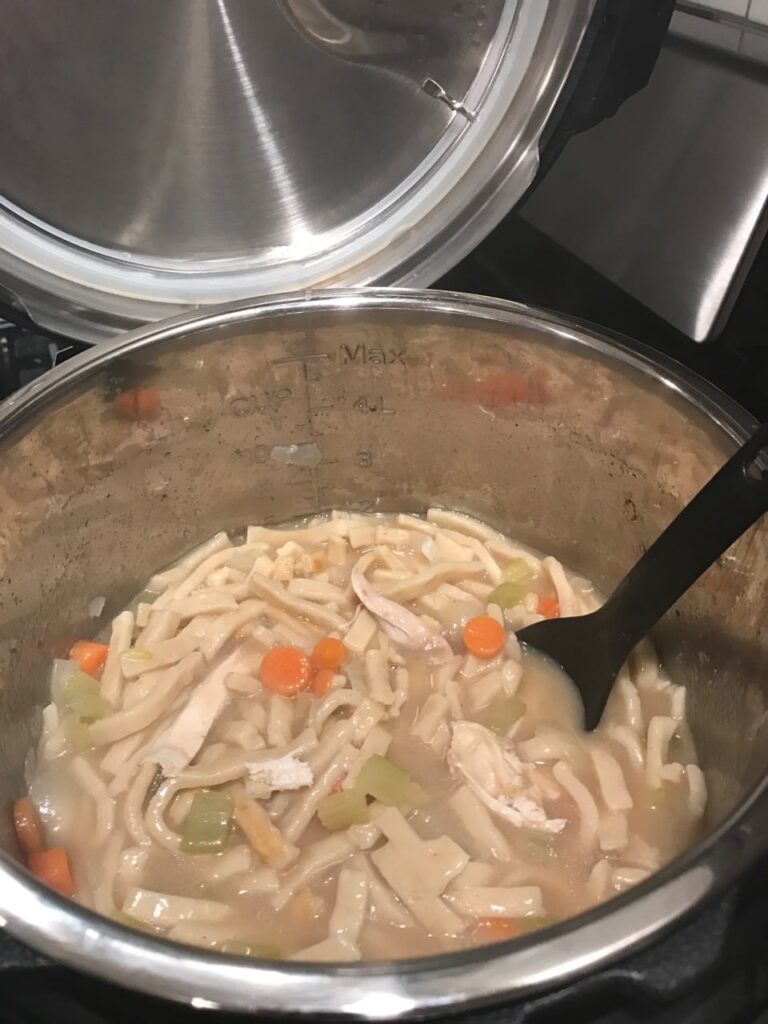
Chicken and noodles in the Instapot. YUM!
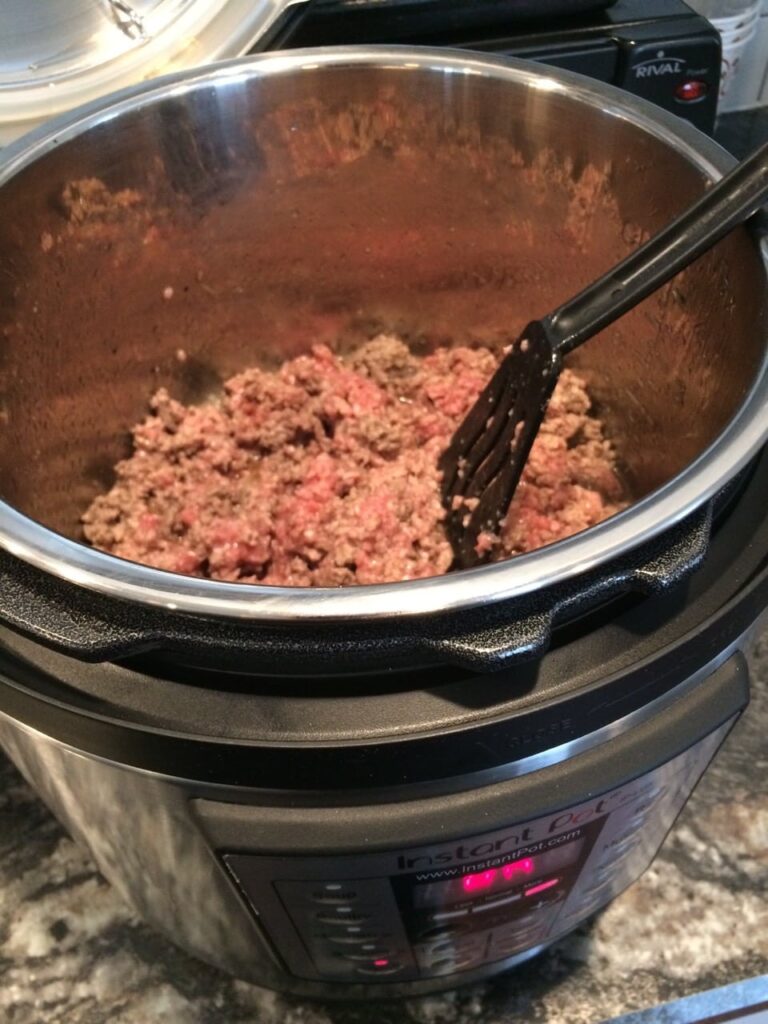
I sauteed ground beef using the Instapot saute feature. Normally I would saute meat on the stove, but if the meat is going into the recipe you might want to saute right in the same pot to capture the extra flavor.
4. Important Features
Here are a few important features to know about your Instapot.
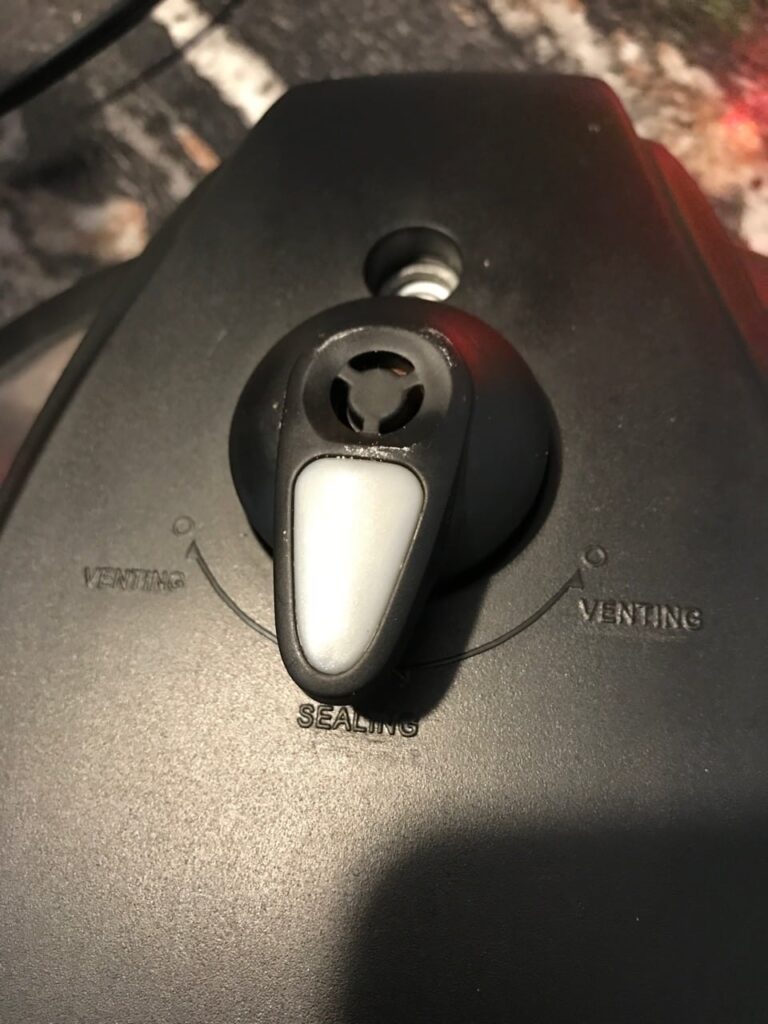
Instapot Vent: Down is in the Sealing or “On” Position. Pushed to the side — it doesn’t matter if left or right – releases the steam.
The top of your Instapot lid has a Vent. When you are ready to begin cooking, seat the lid to the right and turn the whole lid until it clicks into place. (You’ll hear it chime – here is a video) Be sure the vent is pushed into the down position.
Natural Release – After the food is done cooking and the Instapot beeps, you don’t touch it! You allow it to come back to pressure on it’s own (naturally), then you take off the lid.
Quick Release – When the food is done cooking and the Instapot beeps, you quickly release the pressure yourself by pushing the vent to the left or right yourself. Use a wooden spoon to do this, and use caution because a lot of steam may come out. You will not be able to instantly open the lid if there is still pressure in the pot. This is a safety feature. Be patient and you will be able to open the lid soon.

Vent is “off” and steam is released.
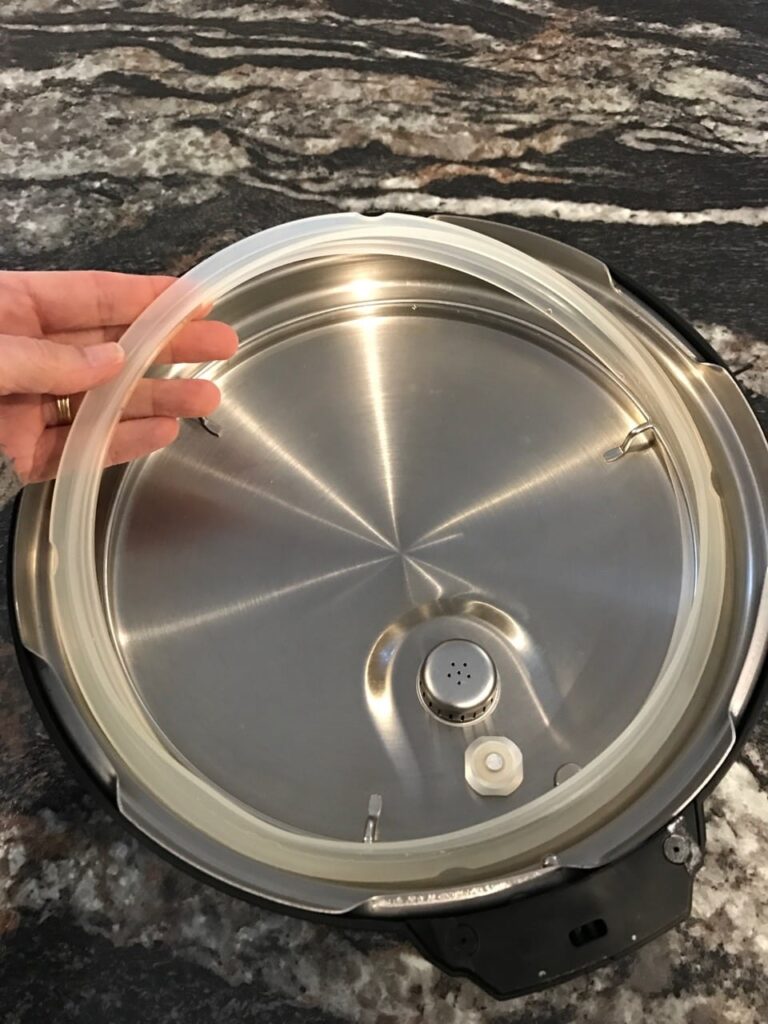
The sealing ring inside your Instapot can be removed for cleaning.
The sealing ring inside your Instapot can be removed for cleaning. Hand wash with soapy water. We’ve noticed that it does absorb flavors. Some people use a separate ring for sweet foods such as desserts. Click here to order an extra Instapot sealing ring

This handy little gizmo that came with your Instapot is a TrivetIt gets food up off the Instapot floor such as hard-boiled eggs. Some people even set dishes on top of it inside the Instapot.
5. Plug in and start cooking!
I have to tell you to be sure to plug in your Instapot because my husband is a natural born IT-type guy (although he’s actually a pastor) and he says the top 2 answers to all IT questions are “Is it plugged in?” and “Have you tried rebooting the computer?”
So I have to tell you to be sure to plug in your Instapot.
Now you are ready to begin cooking!
Do you have an Instapot? What are some of your favorite ways to use it?
More Posts You Will Love
Instapot: What the Heck is It and Do You Really Need One?
How to Make Turkey Broth from a Left-Over Turkey
- Instapot: What the Heck is It and Do You Really Need One?
- How to Get Started with Your Instapot Pressure Cooker
- Instapot: 7 Very Easy Recipes to Get Started
- Instant Pot: 15 All-Time Best Family Recipes
- 7 Favorite Healthy Instant Pot Recipes
- 9 Handy Products You Will Want for Your Instant Pot


FREE The Holy Mess Instant Pot Cookbook
*Printable cookbook with 20 top-rated Instant Pot recipes.
*Step-by-Step Getting Started Directions
*Email series with helpful Instant Pot tips


It is an Instant Pot, NOT an Instapot.
You are right, Sweet, if you are referring to the name brand the correct term is Instant Pot. I didn’t realize my mistake until I had hit the publish button. I’ve corrected a lot of my blogs but need to go through and correct some others. A lot of people are like me and accidentally shorten it to Instapot.
My favorite things to make in my insta por knock off is baked potatoes, sweet ones too, 15 minutes manual, natural release with that trivet thing and 2 c of water then set start timer delay for when you want to eat. So good.
Yum! Thanks for the tip!